From the studio
From ref sheet to fullsuit: building a toony tiger
Every custom fursuit starts as a drawing. This toony tiger fullsuit is a good example of how a reference sheet becomes a suit you can wear, so here is the build, step by step.
November 8, 2026 · 4 min read
1. The reference sheet
The client sent a clear ref sheet with front, back and face views: an orange tiger with black stripes, a yellow belly, blonde hair, grey cheek fluff and black ears. A good ref sheet like this makes every later step easier, because we can check colours and markings against it at each stage.
2. Head base and patterning
We shaped the head base, wrapped it and drew on the seam lines, eye shape, brows and the forehead spot straight from the art. This pattern decides how the fur is cut, so it is where the character's expression is really made.
3. Bodysuit pattern on a duct-tape dummy
The bodysuit was patterned on a duct-tape dummy built to the client's measurements. Every stripe was drawn on by hand, front and back, so the markings line up across the seams once the fur is sewn.
4. Furring and finishing
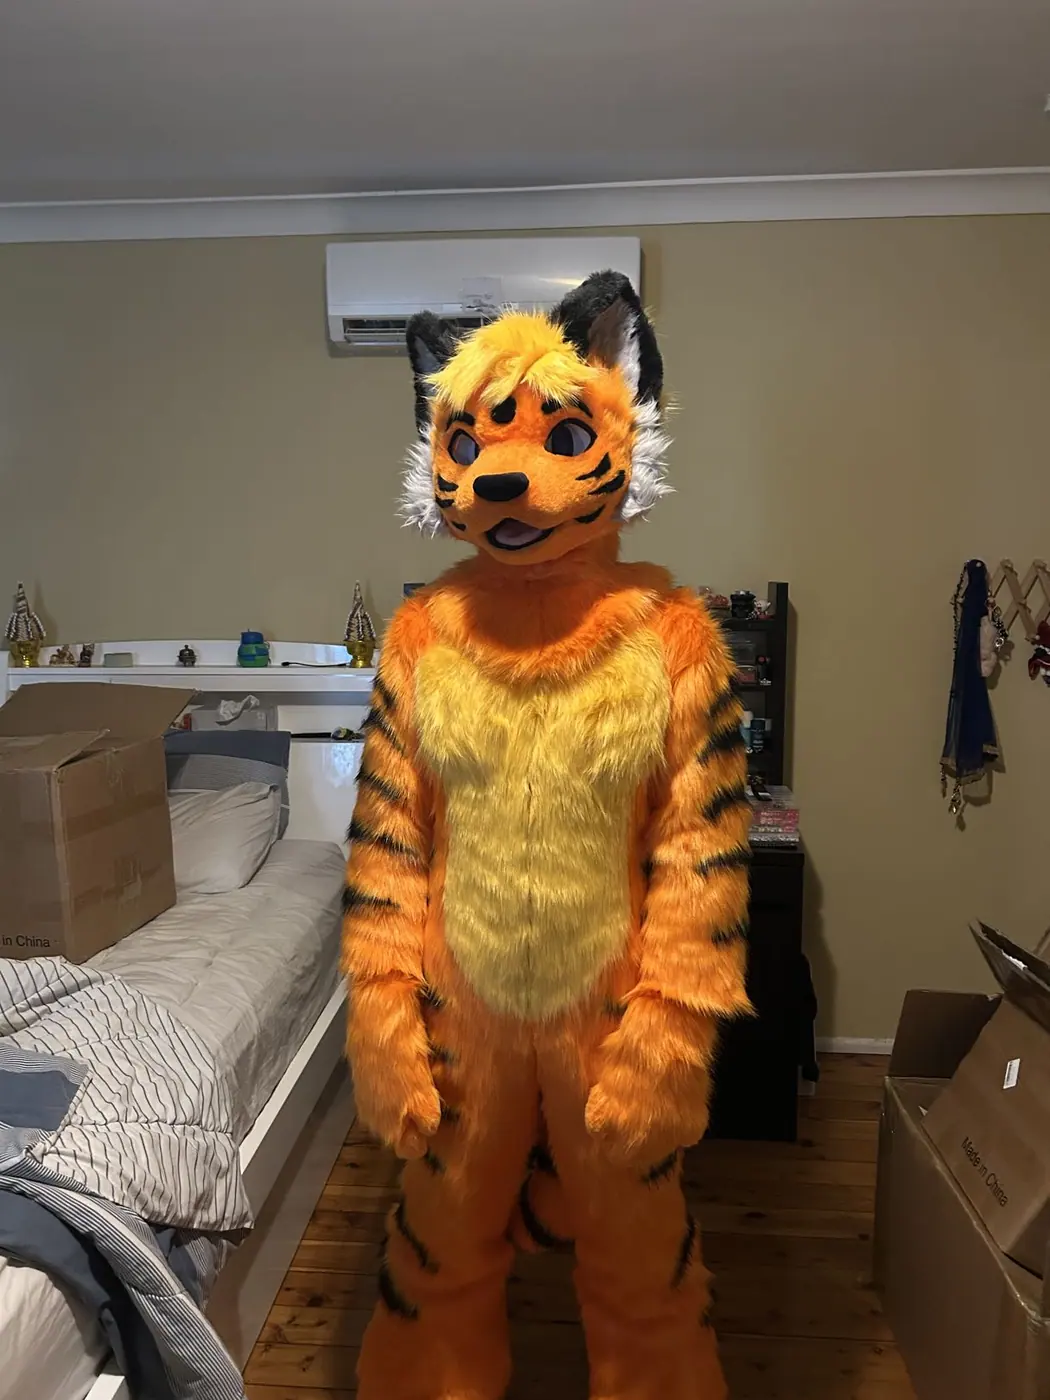
Fur was cut from the pattern, sewn and trimmed. The finished head, bodysuit, paws and tail were checked together in the studio before shipping.
5. Delivered and worn
The suit arrived at the client's door ready to wear, matching the character they designed. Seeing a ref sheet walk around a room is why we do this.